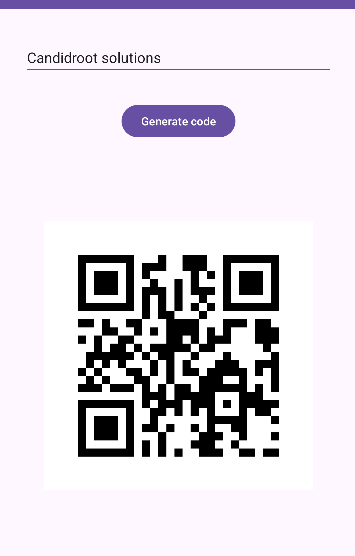
How to Generate QR Code in Android?

QR codes are used in many applications for displaying data. Those QR Code readable forms. This QR code is used to represent data securely. This QR code is read only by machines and not by humans. We have seen many apps that provide Read data from QR codes we can scan those QR codes with our mobile device.

In this article, you will learn how to create your QR codes widget in Android. So let’s take example of QR codes  in Android of Mobile application.

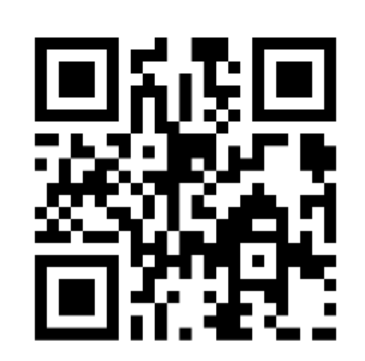
 Example  of QR code


 Step-by-Step Implementation
 Step 1: Create a New Project in Android ​studio (File >new  project). 


  Step 2: Create an activity_main.xml file in your layout folder . path (res>layout)

   Implement the same in​voke the following code inside activity_main.xml file. 

 <?xml version="1.0" encoding="utf-8"?>
<androidx.constraintlayout.widget.ConstraintLayout xmlns:android="http://schemas.android.com/apk/res/android"
xmlns:app="http://schemas.android.com/apk/res-auto"
xmlns:tools="http://schemas.android.com/tools"
android:layout_width="match_parent"
android:layout_height="match_parent"
tools:context=".MainActivity">

<EditText
android:id="@+id/etText"
android:layout_width="0dp"
android:layout_height="wrap_content"
android:layout_marginStart="32dp"
android:layout_marginTop="38dp"
android:layout_marginEnd="32dp"
android:ems="10"
android:hint="Enter text here"
android:inputType="textPersonName"
app:layout_constraintEnd_toEndOf="parent"
app:layout_constraintStart_toStartOf="parent"
app:layout_constraintTop_toTopOf="parent" />
<Button
android:id="@+id/btnGenerate"
android:layout_width="wrap_content"
android:layout_height="wrap_content"
android:layout_marginTop="32dp"
android:text="Generate code"
app:layout_constraintEnd_toEndOf="parent"
app:layout_constraintStart_toStartOf="parent"
app:layout_constraintTop_toBottomOf="@+id/etText" />

<ImageView
android:id="@+id/imageCode"
android:layout_width="wrap_content"
android:layout_height="wrap_content"
android:layout_marginStart="32dp"
android:layout_marginTop="100dp"
android:layout_marginEnd="32dp"
app:layout_constraintEnd_toEndOf="parent"
app:layout_constraintStart_toStartOf="parent"
app:layout_constraintTop_toBottomOf="@+id/btnGenerate"/>
</androidx.constraintlayout.widget.ConstraintLayout>
Step 3: Create an MainActivity.kt file in your package folder .

Implement the same invoke the fol​lowing code inside MainActivity.kt file.

 import android.os.Bundle
import android.view.View
import android.view.inputmethod.InputMethodManager
import android.widget.Button
import android.widget.EditText
import android.widget.ImageView
import androidx.appcompat.app.AppCompatActivity
import com.google.zxing.BarcodeFormat
import com.google.zxing.MultiFormatWriter
import com.google.zxing.WriterException
import com.journeyapps.barcodescanner.BarcodeEncoder


class MainActivity : AppCompatActivity() {
override fun onCreate(savedInstanceState: Bundle?) {
super.onCreate(savedInstanceState)
setContentView(R.layout.activity_main)
val btnGenerate = findViewById<Button>(R.id.btnGenerate)
val etText = findViewById<EditText>(R.id.etText)
val imageCode = findViewById<ImageView>(R.id.imageCode)
btnGenerate.setOnClickListener { v: View? ->
val myText = etText.text.toString().trim { it <= ' ' }
val mWriter = MultiFormatWriter()
try {
val mMatrix = mWriter.encode(myText, BarcodeFormat.QR_CODE, 1000, 1000)
val mEncoder = BarcodeEncoder()
val mBitmap =
mEncoder.createBitmap(mMatrix)
imageCode.setImageBitmap(mBitmap)
val manager =
getSystemService(INPUT_METHOD_SERVICE) as InputMethodManager
manager.hideSoftInputFromWindow(etText.applicationWindowToken, 0)
} catch (e: WriterException) {
e.printStackTrace()
}
}
}
}

Step 4 : Output of above example.


Happy coding!

365Bloggy July 16, 2024
Share this post
Tags
SUBSCRIBE THIS FORM


Archive